Easy Holiday Crafts: Make Your Own Crayons

If you are anything like me, no matter how many kids you have (I have four), at the end of a year, you probably have boxes and bags and drawers full of old, broken, and unusable crayons. Christmas in our house notoriously comes with a brand new box of Crayolas in the stockings, so I always feel the need to clean up and clean out before that day.
I have to admit I am one of the least crafty moms I know, but we like to make these crayons every year because they really are so easy. Also, it always feels good to repurpose something instead of just throwing it away. Because my molds happen to be Christmas molds, this is something we've always made in December and given away as gifts to teachers and friends at school. I must admit though, it would be just as fun and easy to do these in Halloween, Valentines, or Easter themed colors and shapes. (Any time I can avoid passing around more candy for a holiday, I'm in.)
Materials
- old broken crayons
- candy molds
- clean aluminum cans (one per color)
- big pot of boiling water
A Few Notes about Materials
Melting old crayons to make new ones is actually a lot easier than it may seem, and can typically be accomplished with things you already have around the house. The only thing you might not have is the candy molds. If you keep your eyes peeled throughout the year, you can often find them on sale at places like Michael's, or even Walmart. If you are making a special trip today, however, to get some, it is always a crap shoot as to what store has them in stock.
Candy Molds: I actually used old Advent calendars for our molds. Once all the chocolate was popped out, these things were perfect for making 24 Christmas themed crayons. We've re-used these little plastic molds for the last three years and they are still going strong.
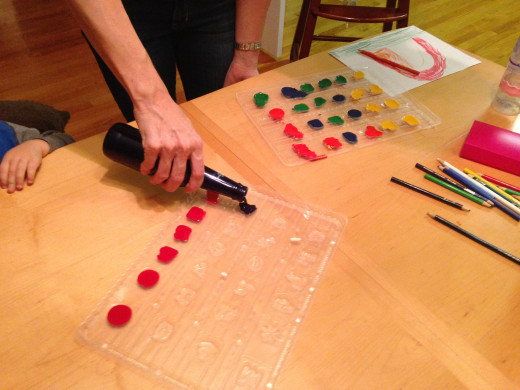
Melting Containers: I usually use all aluminum (soup) cans for melting, which work best. Unfortunately, we only had two in our recycling, so this time I used the only other thing we had an abundance of: beer bottles. And, not just any beer bottles. Bud Light Platinum blue beer bottles. Alas. They actually worked and were great when it came to pouring, but it was really hard to see inside them. That meant we couldn't tell if all the crayons had melted, and it was easy to forget which color we were gathering in each bottle. I made do this time, but I will not use blue beer bottles again.
Crayons: Annoyingly, not all crayons work well for this project. Crayola crayons melt the best. The cheaper the crayon, I've found, the more likely they are not to melt at all. I've left some crayons boiling for up to 45 minutes before and they just sat there, doing nothing.
Boiling pot of water: pretty much anything works here, but if you want your cans not to tip over in the water you either have to have enough cans to hold each other up, or only fill the water a third of the way up the can.
Instructions
1. Gather your supplies and sort crayons into color groups. Note 1: adding pink crayons to the red pile will definitely make your red look pink. If you want a true red, you can only put red crayons in that pile. Note 2: if you want to turn this into a learning activity, you can have your kids mix different colors together to see what happens. Consider the obvious effects of throwing a white or black crayon into the mix.

2. Peel the paper off all the crayons. This is a lot easier if most of your crayons are already broken, or paper-less. To be honest, this is the hardest step. I've considered leaving the paper on and melting the crayons then picking the paper out. It would be messy, but would definitely save a lot of time.
3. Gather all crayons into cans and place cans into boiling water. There is no scientific time limit here on how long it takes the crayons to melt. It depends on the kind of crayons you use and the amount. Basically, watch them. Once you are pretty sure as many of the crayons that are going to melt, have melted, you are ready to pour.

 go in a boiling water bath.")

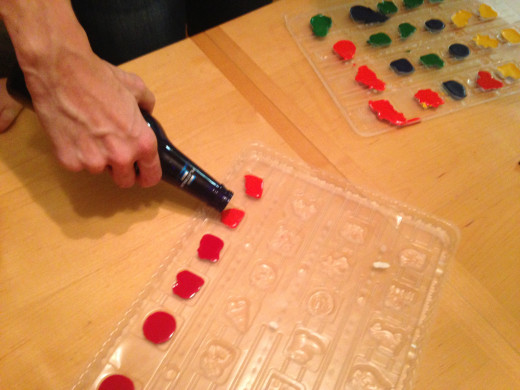
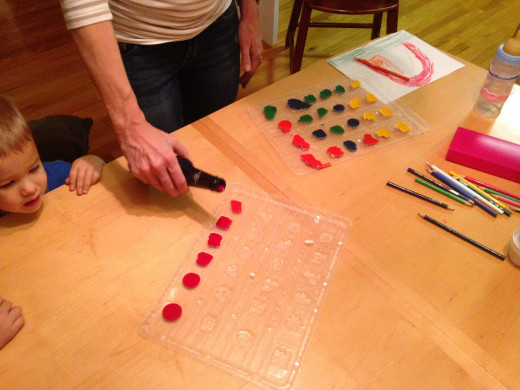
4. Pour melted wax carefully into molds. Note 1: if your kids are shaking the table, you will make a bit of a mess (see my photos). This isn't a huge deal. If you mess up you can wait until the first batch hardens, then re-melt the wax and start over. Note 2: I personally like doing one color for each crayon, but my kids begged for multi-colored crayons this year, so we mixed colors on a few. It is always fun to see how those are going to turn out, so feel free to play around with it a bit.


5. Once all the molds are full, let the wax cool. I say wait at least 10 minutes, but you can eyeball it. You might have to wait longer. If they aren't completely cooled, some wax will stick to the mold, or the crayons will still be soft and will bend or tear apart.
")
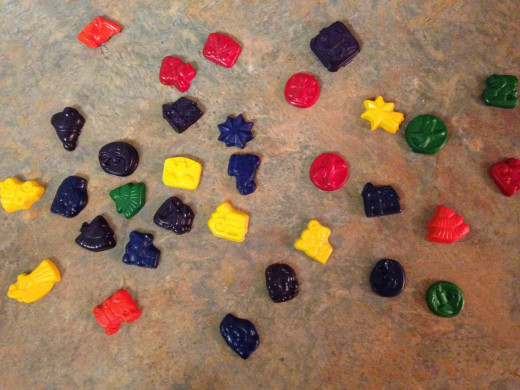
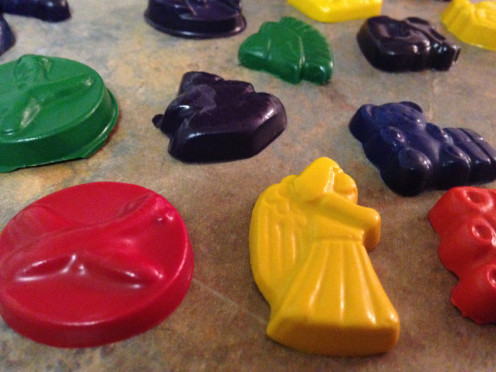
6. Carefully pop cooled crayons out of the molds. They are ready to use immediately, or you can gather them into bags or jars, add a little bow, and they make a really cute gift.